 TextMarshal
The newest version of TextMarshal Management was released 3/7/2021. (Download it here.)
Start/Stop
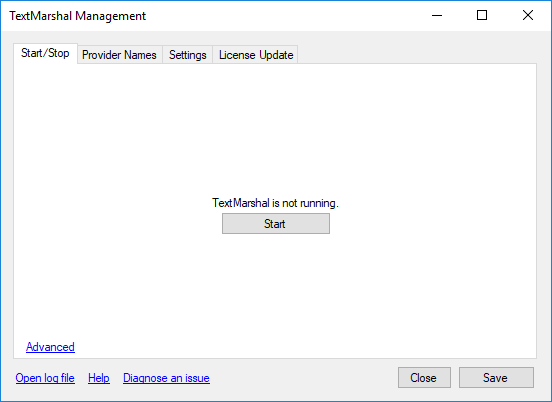
This tab displays the current status of the TextMarshal service and lets you start or stop it.
TextMarshal can only send reminders and process replies when the service is running.
It's best to stop the service before you save configuration changes and then restart it.
If the service stops on its own shortly after you start it, use the Diagnose an issue link to investigate the problem.
If the service stops on its own shortly after you start it, use the Diagnose an issue link to investigate the problem.
Provider Names
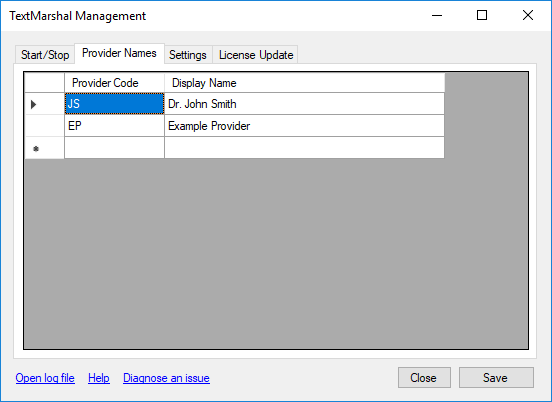
This tab lets you set display names for providers. If the provider for a certain appointment has a display name set here,
the named-provider reminder message will be sent to the appointment's client. If the standard (unnamed-provider) message
template (on the Settings tab) is blank, only clients of providers in this list will receive reminders.
The Provider Code column contains the provider's identifier (not logon name) in SOS. The Display Name column is the text that will be shown to clients as the provider's name.
To add a new entry, click a cell in the row marked with an asterisk and start typing. To edit a cell, click it and type the new value. To delete a row, click the row button on the left (where the arrow appears in this screenshot) and press the Delete key on your keyboard.

Settings
This tab lets you change all TextMarshal settings. To update a setting, select it, type the new value in the text box near the bottom,
and click the Update button. In this screenshot, the Latest send time will be updated from 7:00 PM to 6:30 PM
after the user clicks the Update button. When you select a setting, a description of it appears above that text box.
- For a description of the SMS (message content) settings, see "What kind of messages can TextMarshal send?" on the Q&A page.
- Confirm words: A comma-separated list of keywords that will cause a message from a client to be considered a confirmation of an appointment. If it was set to ok,okay,yes,confirm, a client could confirm by replying with, for example, Ok, Yes I'll be there, or Confirm my appointment, but not I'm confirming my appointment.
- SOS username and SOS password: The username and password to use in authenticating to the database, respectively. Note that normal SOS users' accounts (i.e. non-super users) do not actually have the human-entered password set as the database password. Therefore, it is easiest to use a super user's account for TextMarshal. If you have not updated to a 2016 version of SOS, set the username to SOS and leave the password blank. When these entries are selected, a Provision link appears above the Update button. The provisioning feature allows you to configure an SOS account for TextMarshal simply by entering your current SUPER password. Once the specified account (SU_IT or SU_SOS) is provisioned, the credentials are automatically written to these fields.
- Earliest send time: The time of day at which reminder messages will be sent out, provided that the database is online. If the database is inaccessible at this time, TextMarshal will try again each minute.
- Latest send time: The time of day at which TextMarshal will give up reconnecting to the database. Therefore, this is the latest time at which reminders could be sent out.
- 'OK to text' indicator: A word that, when included in a client's telephone extension field in Office Manager, causes TextMarshal to use that number for reminder messages. It's alright for the extension field to have other data, as long as this indicator is separated from the other contents by a space.
- Ignored appointment types: A comma-separated list of appointment type IDs that will never have reminder messages sent. This is useful if you have appointments in your database that do not correspond to the client actually coming in.
- Ignored provider codes: A comma-separated list of provider codes whose clients will never receive reminder messages. This is useful if you have providers in your database that do not correspond to actual providers (e.g. a testing room).
- Ignored days: A comma-separated list of days whose appointments will never be sent for. This is useful if you use "appointments" for certain weekdays to keep track of other information.
- Week plan: A comma-separated list of which day to send remind for each day's appointments on, starting Sunday. The first entry is the day to send for Sunday appointments on, the second is the day to send for Monday's, and so on until Saturday. None can be used instead of a weekday to disable sending for that day's appointments. You can click the "edit plan" link for a graphical interface to edit this setting.
- Weekend jump: When to send reminder messages for Monday's appointments. Only used if Week plan is unset. This value must be Saturday, Sunday, or Friday. Capitalization does not matter. If you leave this item blank, the default is Sunday. If you set this to anything but Sunday, make sure that your reminder message templates use the %DAY% placeholder rather than literally including the word "tomorrow."
- Second reminder plan: The week plan for second reminders, i.e. an extra reminder message sent if the client has not yet confirmed an active appointment. This must be set in order for second reminders to be sent.
- Second reminder send time: The time of day at which to send second reminders. This must be set in order for second reminders to be sent.
- Second reminder prefix: Text to prepend to the reminder SMS message when sending a second reminder. If you leave this blank, second reminders will appear the same as the initial reminder.
- Default area code: The area code to assume for telephone numbers that do not have one set. If you leave this blank, messages will not be sent to numbers with no area code specified.
- Confirmation status: The SOS appointment type to assign when the client confirms their appointment. CONFIRMED (default) makes the appointment Confirmed; AK makes it Appointment Kept.
- Licensee SMS number: The full international-format number (e.g. +15552564096) of the TextMarshal licensee. That number will receive a notification when TextMarshal's license will expire soon. If you leave this blank, no license notifications will be delivered.
- Remote managers: The full international-format numbers that are allowed to send management messages to TextMarshal. The list is delimited by semicolons, e.g. +15553698642;+15559092123. Management messages from other senders will be treated as unintelligible.
- Report folder: The path (without quotes) to the folder in which TextMarshal will save a report of confirmed appointments for the previous day. This folder must exist.
- Enable diagnostics: Whether diagnostics are enabled (true or false). TextMarshal can automatically inform support of problems. This information is used only to improve your TextMarshal installation and is never sold or marketed to anyone. No client data is included in these reports.
- ClickSend dedicated number: The dedicated number in full international format from which to send messages via ClickSend.
- ClickSend user ID: The username of the ClickSend account from which to send messages.
- ClickSend key: The ClickSend API key (not the account password). You can get the correct value for this setting from the API Credentials section of the ClickSend dashboard.
- ClickSend poll interval: The time (in milliseconds) between checks for new messages from ClickSend.
- Connection string (advanced): The connection string to use when connecting to the database. Do not modify this value unless you are certain that it needs to be updated. When this entry is selected, a Test DB link appears that you can click to check whether the current settings can establish a database connection.
- DB retry interval (advanced): The time (in milliseconds) to wait between database reconnection attempts.
- Checkpoint interval (advanced): The interval (in milliseconds) at which TextMarshal will save its state to disk in case of power failure.
License Update
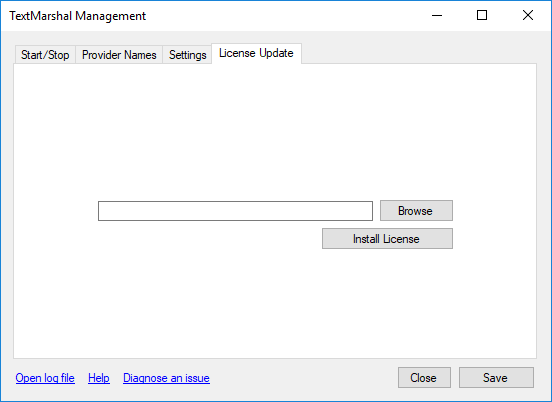
This tab lets you install new versions of your TextMarshal license. Once you have acquired a new license file,
click the Browse button to select it. Then click Install License to activate it.